Introduction
The leg press machine stands as one of the most utilized pieces of equipment in gyms across America. This powerhouse tool offers an effective way to build lower body strength while providing more stability than free-weight alternatives. However, despite its popularity and apparent simplicity, many fitness enthusiasts experience discomfort or even injury when using this equipment incorrectly. Understanding how to properly use the leg press machine can make the difference between developing impressive leg strength and suffering from chronic knee pain that sidelines your fitness journey.
What Is a Leg Press Machine and Why Use It?
A leg press machine is a resistance training device designed to target the quadriceps, hamstrings, and gluteal muscles. Unlike free-weight exercises such as squats, the leg press machine guides your movement along a fixed path, providing additional stability and allowing for greater weight loads with potentially less technical skill required.
The typical leg press machine features a seated position where users push a weighted platform away from their body using their legs. Several variations exist, including:
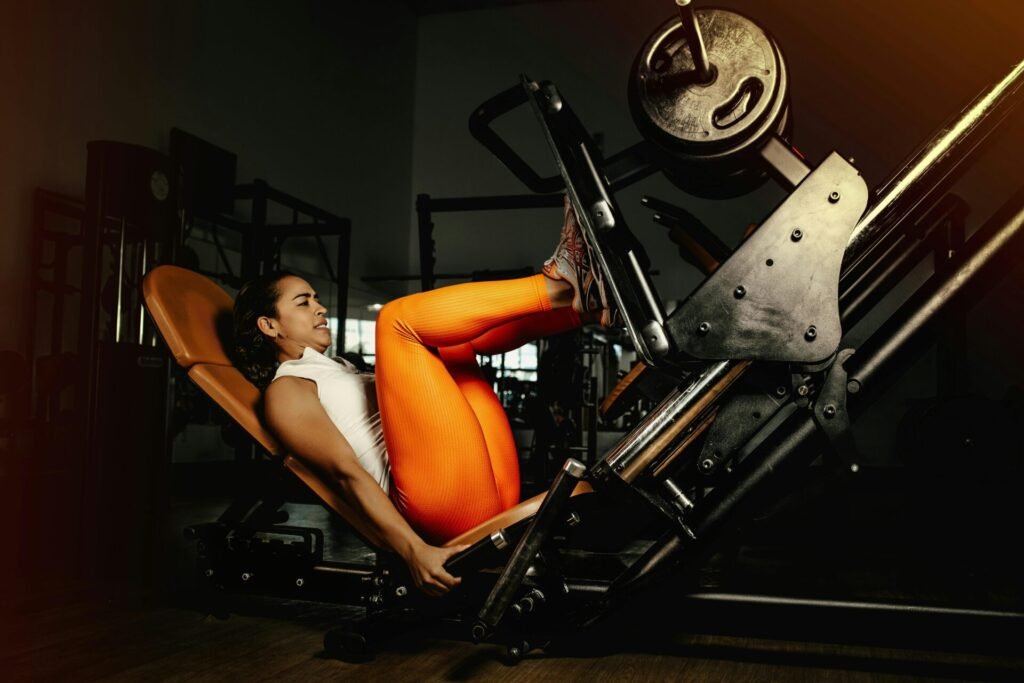
- 45-degree leg press: The most common type, where users sit at an angle and push the weight upward along an inclined track
- Horizontal leg press: Users sit upright and push the weight straight forward
- Vertical leg press: Users lie on their back and push the weight directly upward
Each variation offers slightly different biomechanics and muscle engagement patterns, though all primarily target the quadriceps, with secondary emphasis on the glutes and hamstrings.
Benefits of Incorporating the Leg Press Machine
Muscle Development
The leg press machine effectively targets multiple lower body muscle groups simultaneously:
- Quadriceps: The primary muscle group engaged, particularly the rectus femoris, vastus lateralis, vastus medialis, and vastus intermedius
- Gluteals: Especially when using a wider stance or placing feet higher on the platform
- Hamstrings: Engaged as synergists throughout the movement, particularly during the lowering phase
- Calves: Receive secondary activation, particularly when pushing through the balls of the feet
This comprehensive lower body engagement makes the leg press machine a time-efficient option for developing overall leg strength and muscle mass.
Safety Advantages
For certain populations, the leg press machine offers safety advantages compared to free-weight alternatives:
- Beginners: The guided motion requires less balance and coordination than squats
- Rehabilitation: Allows for controlled movement patterns during recovery from certain injuries
- Older adults: Provides stability while still enabling progressive resistance training
- Individuals with certain mobility limitations: Accommodates those who may struggle with traditional squat mechanics
The seated position also eliminates the need to balance a load on the spine, which can be beneficial for those with certain back concerns.
Progressive Overload Potential
Perhaps one of the most significant advantages of the leg press machine is its potential for substantial progressive overload—the gradual increase of stress placed on muscles to stimulate development. The mechanical advantage provided by most leg press designs allows users to handle greater loads than with free-weight alternatives, potentially accelerating strength gains in the lower body.
Common Causes of Knee Pain When Using the Leg Press Machine
Despite its benefits, improper use of the leg press machine can lead to knee discomfort or injury. Understanding the potential causes of knee pain can help users modify their approach for safer, more effective training.
Cartilage and Joint Issues
According to orthopedic surgeon and sports medicine specialist Dr. David Geier, the deep knee flexion phase of the leg press places significant stress on the posterior aspect of the knee, including the bones and cartilage in that region. This area is commonly where cartilage damage and structural issues like meniscus tears occur.
For individuals with early-stage arthritis or existing knee injuries, this stress can trigger pain responses. The knee joint involves multiple structures—including tendons, ligaments, bursae, bones, and cartilage—any of which can become irritated or damaged with improper loading patterns.
Form Mistakes That Compromise Knee Safety
Several common form errors increase the risk of knee pain when using the leg press machine:
- Allowing knees to cave inward: This creates medial stress on the knee joint and can strain the medial collateral ligament
- Lowering the weight too deep: Excessive knee flexion increases posterior knee pressure and can compromise joint integrity
- Locking knees at extension: Creates shearing forces at the knee joint and places stress on ligaments
- Lifting heels off the platform: Shifts weight distribution improperly and increases anterior knee stress
- Using a stance that’s too narrow: May create improper tracking of the patella (kneecap)
- Bouncing at the bottom: Creates dynamic forces that can exceed the joint’s capacity to absorb shock
The American Council on Exercise (ACE) emphasizes that proper form is essential for preventing unnecessary strain on knee structures.
Excessive Weight Load
A fundamental mistake many gym-goers make is attempting to use too much weight too soon. While the leg press machine can accommodate impressive loads, starting too heavy compromises form and places excessive stress on joint structures rather than properly targeting muscle tissue.
For beginners, fitness experts typically recommend starting with approximately 50 to 75 percent of body weight. This moderate approach allows for proper technique development while providing sufficient stimulus for initial strength adaptations without overwhelming joint structures.
Proper Leg Press Technique to Protect Your Knees
Mastering proper form on the leg press machine significantly reduces injury risk while maximizing muscle development. Follow these step-by-step guidelines for optimal results:
Setup Position
- Adjust the seat position so your hips remain firmly against the backrest throughout the movement
- Place your feet on the platform at approximately shoulder-width apart, with toes pointing slightly outward (about 5-10 degrees)
- Position your feet at a height that allows your knees to form approximately 90-degree angles at the starting position
- Grip the handles alongside the seat for stability
- Ensure your lower back maintains contact with the backrest, avoiding any arch or gap
Execution Mechanics
- Take a deep breath, brace your core, and release the safety mechanisms
- Lower the weight under control, maintaining even pressure through both feet
- Allow your knees to bend until they reach approximately 90 degrees (or slightly deeper if comfortable and pain-free)
- Keep your knees tracking in line with your toes throughout the movement
- Push through your mid-foot (not just the toes or heels) to drive the platform away
- Exhale as you extend your legs, stopping just short of full knee lockout
- Pause briefly at the top position
- Lower the weight back down slowly and under complete control
Foot Placement Variations
Foot positioning on the platform significantly impacts muscle emphasis and knee stress:
- Standard (middle) position: Balanced activation of quadriceps, hamstrings, and glutes
- Higher foot placement: Increases gluteal and hamstring engagement while potentially reducing anterior knee stress
- Lower foot placement: Emphasizes quadriceps development but may increase anterior knee pressure
- Wider stance: Targets inner thigh adductors and emphasizes gluteal activation
- Narrower stance: Focuses more on quadriceps development
For those experiencing knee discomfort, a slightly higher foot placement often reduces anterior knee stress while maintaining effective muscle stimulation.
Modifications for Those With Knee Concerns
Individuals with existing knee issues can still potentially benefit from the leg press machine with appropriate modifications:
Range of Motion Adjustments
Dr. Geier suggests that people with knee pain from prior injuries or general wear and tear should consider limiting the depth of their leg press. Reducing the range of motion—stopping before reaching deep knee flexion—can significantly decrease posterior knee stress while still providing effective muscle stimulation.
Research suggests that working through a 0-90 degree knee angle range (rather than going deeper) may provide optimal muscle activation while minimizing joint stress for many individuals.
Weight Selection Strategies
For those with knee concerns, weight progression should be particularly conservative. Consider these guidelines:
- Start with lighter loads (30-50% of what you might normally use)
- Increase repetitions rather than weight initially (12-15 reps vs. 6-8)
- Focus on perfect technique and controlled tempo
- Progress weight incrementally (5-10% increases at most)
- Reduce weight immediately if any knee pain occurs
This cautious approach allows joint structures to gradually adapt to the training stimulus while still promoting muscle development.
Supportive Equipment Options
According to the National Academy of Sports Medicine, knee sleeves or wraps can provide helpful support during leg press exercises, particularly when lifting heavier loads. These supportive accessories offer several potential benefits:
- Increased joint warmth, which may improve synovial fluid viscosity
- Mild compression, which can enhance proprioception (joint position sense)
- Psychological confidence, which may improve performance
While not necessary for everyone, these supports may be valuable tools for those with mild knee issues or those lifting particularly challenging loads.
Alternative Exercises for Leg Development
While the leg press machine offers numerous benefits, diversifying lower body training with complementary exercises creates more comprehensive development and potentially reduces overuse patterns.
Free-Weight Alternatives
Several free-weight exercises effectively target similar muscle groups:
- Squats: The gold standard for overall lower body development, though requiring more technical skill
- Lunges: Excellent for addressing strength imbalances between legs
- Deadlifts: Emphasize posterior chain development with significant carryover to functional strength
- Bulgarian split squats: Provide unilateral development with less spinal loading than traditional squats
Each of these alternatives engages the body differently than the leg press, providing complementary stimulus and potentially more functional carryover to real-world activities.
Machine-Based Options
For those who prefer machine stability but want to vary their training:
- Hack squat machine: Provides guided motion with more upright posture than most leg press variations
- Smith machine squats: Offers a fixed bar path with adjustable safety stops
- Pendulum squat: Creates a unique resistance curve that many find joint-friendly
- Belt squat: Removes spinal loading while maintaining free-movement patterns for the lower body
These alternatives can be rotated with the leg press machine to create program variety while maintaining the stability advantages of guided movements.
Low-Impact Conditioning Exercises
As noted in the reference article, certain cardio equipment options provide joint-friendly ways to strengthen the legs:
- Stationary bikes: Offer adjustable resistance with minimal joint impact
- Elliptical trainers: Provide full lower body engagement with reduced ground reaction forces
- Water-based exercises: Create natural resistance with almost no joint compression
These options can supplement strength training while improving muscular endurance and cardiovascular health without adding joint stress.
Creating a Balanced Leg Development Program
Rather than relying exclusively on the leg press machine, consider this framework for comprehensive lower body development with joint health in mind:
Sample Weekly Structure
Monday: Primary Strength Focus
- Warm-up: 5-10 minutes light cardio + dynamic stretching
- Main movement: Leg press (4 sets of 8-12 reps)
- Supporting exercises: Romanian deadlifts, walking lunges, calf raises
- Cool down: Static stretching for major leg muscle groups
Wednesday: Metabolic Conditioning
- Circuit training: Bodyweight squats, step-ups, glute bridges
- Cardio intervals: Stationary bike or elliptical (30 seconds high intensity, 90 seconds recovery)
- Core stabilization work: Planks, side planks, bird dogs
Friday: Secondary Strength Focus
- Warm-up: 5-10 minutes light cardio + dynamic stretching
- Main movement: Front squats or hack squats (3-4 sets of 8-10 reps)
- Supporting exercises: Single-leg variations, hamstring curls, lateral band walks
- Cool down: Foam rolling and static stretching
This balanced approach provides sufficient training stimulus while allowing adequate recovery between sessions focusing on similar movement patterns.
Progressive Programming Considerations
For sustainable progress without joint issues:
- Gradual progression: Increase either weight, reps, or sets—but not all simultaneously
- Deload periods: Incorporate planned reduction weeks (typically 30-40% less volume) every 4-6 weeks
- Movement variety: Rotate primary exercises every 4-8 weeks while maintaining similar movement patterns
- Tempo manipulation: Vary lifting speeds to create different stimulus without increasing load
- Recovery prioritization: Ensure adequate sleep, nutrition, and stress management
These programming strategies help maximize results while minimizing injury risk over the long term.
Nutrition and Recovery for Joint Health
Optimizing leg development while protecting knee health extends beyond exercise selection and technique. Nutritional and recovery factors play crucial roles in joint integrity and pain management.
Anti-Inflammatory Nutrition Strategies
Research increasingly shows connections between nutrition and joint health:
- Omega-3 fatty acids: Found in fatty fish, flaxseeds, and walnuts, these have demonstrated anti-inflammatory properties
- Colorful produce: Fruits and vegetables rich in antioxidants help combat exercise-induced oxidative stress
- Adequate protein: Supports tissue repair and provides building blocks for cartilage maintenance
- Hydration: Maintains synovial fluid viscosity and supports overall joint function
- Limiting pro-inflammatory foods: Reducing processed foods, excessive sugar, and trans fats may benefit joint health
While no diet eliminates all exercise-related discomfort, these nutritional strategies create an internal environment more conducive to joint recovery and adaptation.
Recovery Modalities
Physical recovery techniques that complement a well-designed training program:
- Strategic rest: Allowing 48-72 hours between intense sessions targeting the same muscle groups
- Sleep optimization: Prioritizing 7-9 quality hours nightly to maximize recovery hormone production
- Active recovery: Light movement like walking or swimming on rest days to promote blood flow without stress
- Cold therapy: Brief ice application (10-15 minutes) following intense sessions if joint inflammation occurs
- Heat therapy: Warm packs before training to increase tissue extensibility and joint fluid viscosity
- Massage techniques: Self-myofascial release using foam rollers or massage tools to address soft tissue restrictions
These recovery methods support both performance progress and joint longevity when applied consistently.
When to Seek Professional Help
While temporary muscle soreness is normal following challenging leg press sessions, certain pain patterns warrant professional attention:
Red Flags That Require Medical Evaluation
According to the Mayo Clinic, these symptoms suggest potential injury requiring medical assessment:
- Inability to bear weight on the affected leg
- Significant swelling in or around the knee joint
- Inability to fully extend or flex the knee
- Visible deformity around the knee area
- Sensation of the knee “giving way” during activity
- Pain that persists beyond 72 hours despite rest and basic care
- Clicking, popping, or grinding sensations accompanied by pain
Seeking timely medical attention for these warning signs can prevent minor issues from developing into chronic problems.
Professional Resources
Consider consulting these professionals for knee concerns:
- Physical therapists: Specialize in movement assessment and corrective strategies
- Sports medicine physicians: Diagnose and treat activity-related injuries
- Certified personal trainers: With specialization in corrective exercise or special populations
- Orthopedic surgeons: For severe or persistent issues requiring advanced intervention
Many issues can be addressed successfully with proper guidance, allowing for continued training and progress without chronic pain.
Conclusion: Balanced Perspective on the Leg Press Machine
The leg press machine represents a valuable tool in the fitness arsenal when used appropriately. With its potential for significant muscle development and its accessible nature for various populations, it deserves its popularity in gym settings nationwide. However, this appreciation must be tempered with appropriate knowledge regarding proper technique, suitable modifications, and awareness of potential issues.
By understanding how to optimize leg press form, implement appropriate weight progression, and incorporate complementary exercises, fitness enthusiasts can develop impressive lower body strength and aesthetics while minimizing knee strain. For those experiencing discomfort, the modifications outlined provide pathways to continue beneficial training while addressing individual needs.
Remember that sustainable fitness progress requires a comprehensive approach—one that balances challenging stimulus with appropriate recovery, respects individual biomechanics, and prioritizes long-term joint health alongside aesthetic and performance goals. With this balanced perspective, the leg press machine can remain a cornerstone in your training program for years to come, delivering impressive results without compromising knee integrity.